Showing posts with label party. Show all posts

Tuesday, 27 September 2016

Art Party // An Arty Girl's 8th Birthday Party!


My darling daughter Lily was turning eight and was due for a party! 

We don't do parties too often (so far, each of my kid's have had one for their 1st, 5th and now 8th birthdays). Lily's last party was her adorable Princess Tea Party when she was five (check it out here.... my teeny girl!). As we don't have them every year, when we do, I enjoy going all out to celebrate my little munchkins - and boy, do they LOVE a party :) They get to choose the theme too of course - and after running through a hundred theme variations, Lily finally settled decisively on an Art Party - fitting given her firm plans to be 'an artist' one day!

I have to admit I was thrilled with such a fun and creative theme and had an absolute blast pulling this together, with my ideas-filled little assistant planner! This kid had a clear vision and actually I was basically the assistant planner, carrying them all out on her behalf haha! Maybe she will be an event manager like her mama one day :) Lily's original big idea was to hold the party IN an art gallery so she could 'look at all the art with her friends then paint pictures of what we saw and have cake and dancing!'. Amazing, right?! But it was the midst of winter and I couldn't find a gallery that also had a good space for art and food and a horde of giggling little girls... so we decided to bring the art to us instead - with our own little gallery!

We had an absolute ball putting this all together. Homespun, simple, child-led and theme-driven, it was just a joy. I couldn't do this every year but I have to admit I absolutely love throwing parties when the time comes! I'm mostly grateful for the opportunity to make my kids feel cherished with a big celebration. And I was thrilled with Lily's creative choice because the theme just made it so easy and fun for everyone. Lots of art, laughter and food - what could be better?!


Thanks to my lovely friend Amber for taking many of following photos while I was busy flitting around! 

I think most of them speak for themselves so.... enjoy scrolling, if kid's parties are your thing ;)


DIY Art Gallery. It was so fun gathering images of some of our favourite art works. It was amazing how powerful and inspiring they all were displayed on the walls together too. The impact of beautiful art is not to underestimated :)
The Art Table, ready and waiting...
I made this simple little banner for Lily's 1st birthday party (I did the same for the boys too) and we pin them up for every birthday :) 

I made this in Canva - easy and a nice little welcome sign and wall decor.
What's a themed party without coming up with silly matching names?
Pop Art for Popcorn?! Yes, I am a genius. Ha!


'Art Palette' Rainbow Poke Cake! Click here to see how I made it and how it looks inside (clue - colourful!!). It was so easy, fun and delicious!! :) 
My lovely mother-in-law made these adorable art palette cookies
Lily came up with these names and wrote the signs. LOVE :) You can't see them too well but they are layered jelly cups.
Healthy Bliss Balls go rainbow!
Eli (6yrs) bought this little mannequin as a gift for Lily with his own money! *melt* Perfect table accessory!
Who needs table decor when you have art supplies to scatter around!? Colourful, useful and fun!  For art supplies, I had watercolours (both liquid and dry), watercolour paper, charcoal, black fine tip pens and also this fun colourful air-dry clay the kids could use to make mini-models.


An arty rainbow of fruit and veggies


I love open ended arts and crafts for kids, so I simply laid out all the materials and let them do what they liked - painting, drawing, modelling with clay. It was very relaxed and so sweet to see all the girls working away at their art. The drawing prompts on the table and walls helped inspire them when they needed it too.
I was thrilled when I found these cute little art palettes and brush sets at a cheapie shop. It meant each girl could have her own little set to use and take home. I wrote their name on each in gold pen.
'I'm just here for the food'
So, so excited for his sister's big day, my sweet boy xx
Little artists get to work!


I like to come up with (more useful, less sugary) alternatives to party bags where I can :) This time I got a bunch of calico 'library bags' and the kids had a total blast decorating them with puffy paint pens (retro!), fabric stickers and markers. Something to carry home all their art in, and use after the party. The girls were thrilled with this and I think the lollies weren't too missed ;)
Beautiful artworks drying in the afternoon sun. Little clay model animal figurines too!
They were very serious about their library bag decorating!


Lily came up with this game, kinda like 'pin the tail on the donkey' but each
blindfolded girl had to try and draw some clothing on the Lily outline, haha!
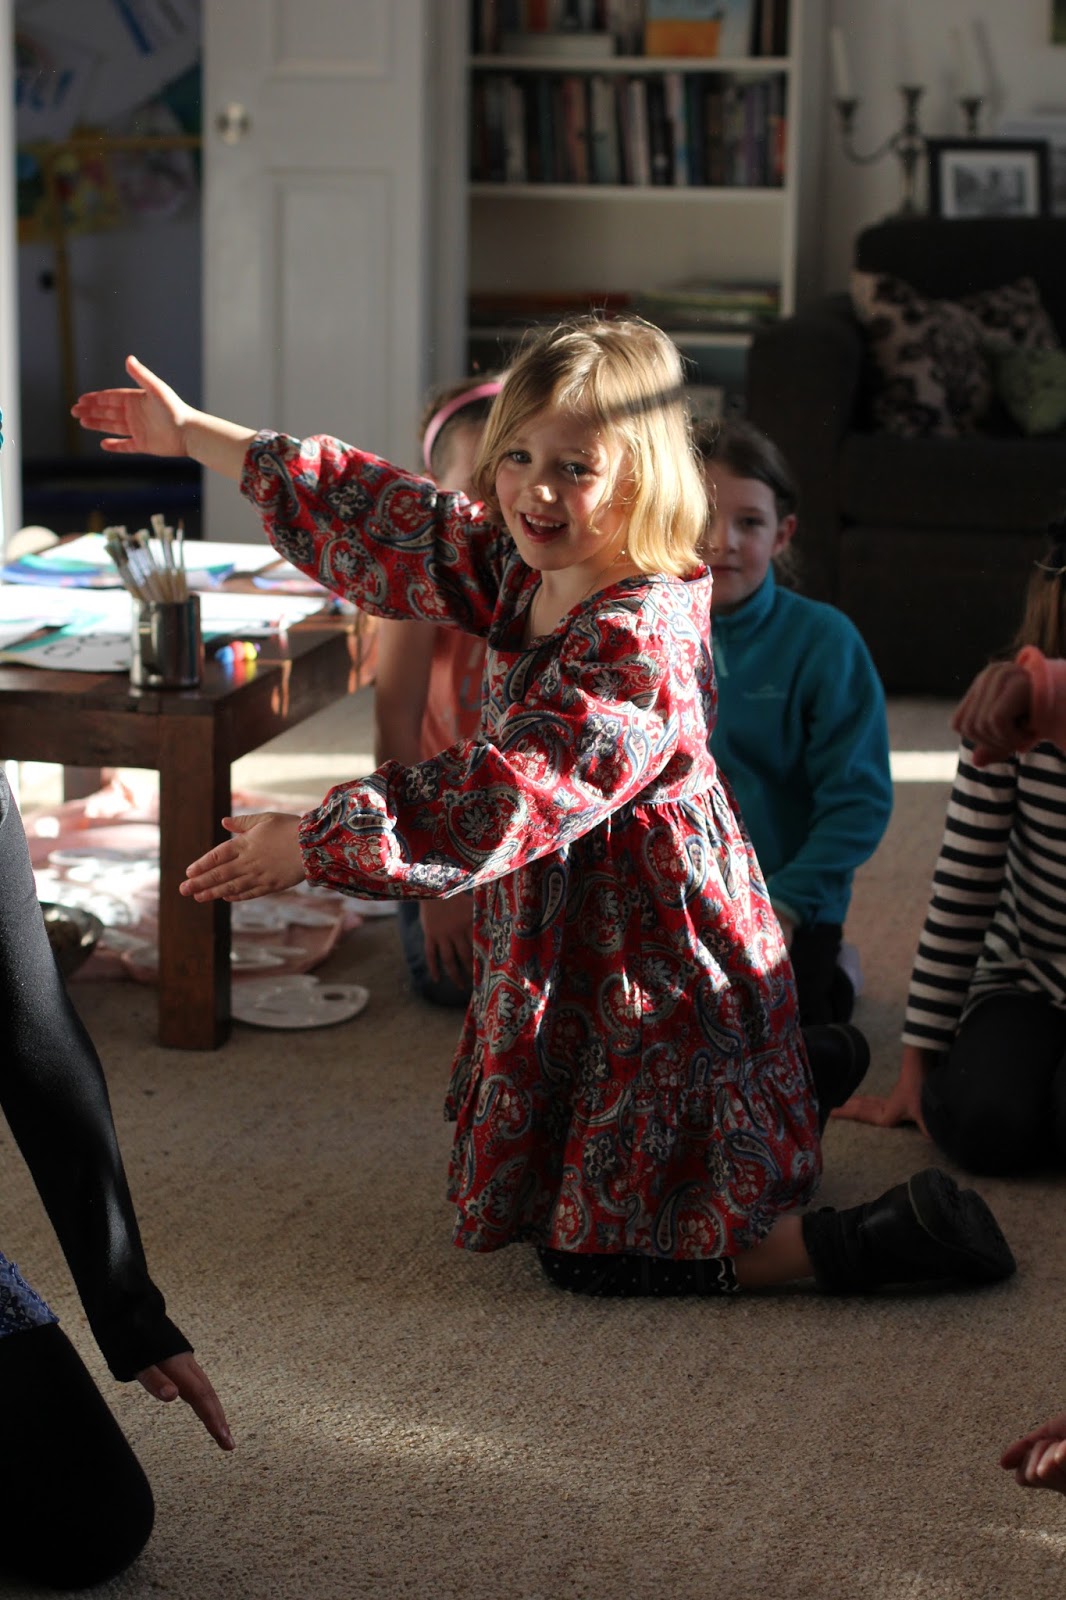
Another Lily Idea: Play Arty Musical Statues - we played music and everyone
danced around. When the music stopped, you had to freeze in a pose from one of the
art works on the walls!! It was super cute :) Harper is giving a great pose here!
Dancing up a storm and suddenly looking way too grown up! He was very into the game and had no interest in being 'out' haha

Blissfully happy to be with friends at her very own party :)
The artistes at work!
Miles was very much part of the action :)
The moment arrives... lighting the cake....

Oh my, I love this photo, cuddled up with my stripey little party-planning accomplice
as she joyfully eyes off her cake! I love this girl so much, planning a party for her was
truly a pleasure. What a wonderful young lady she is, I'm simply in awe of her xx


Great memories of a wonderful day...


Happy Birthday, Lily. What a privilege it is to celebrate you xx

Monday, 1 August 2016

'Art Palette' Rainbow Poke Cake!!


I wanted to share my recent discovery on how to take a boring old cake to 'next level'. Like 'how did I not know this was a thing' kind of next level!!!! 

It's called a 'Poke Cake'... Sounds weird, right?!? Read on and I will tell and show you more (if you haven't heard of it either, that is!)

My daughter recently had her 8th birthday party. We don't do parties that often around here so when we do, we kinda go all out!!! #canthelpmyself. She requested an Art Party, being a budding little creative, with an Art Palette cake to go with it. She is all about the big ideas, my girl, and I was thrilled with such a fun theme!

The Art Palette cake idea was pretty self explanatory. I wanted to do buttercream icing (cos - yum) with fondant 'paint splatters' (cos - fun!). As much as I love to make and bake, rather than bake the cake itself, I chose to cheat and buy a plain un-iced slab from the supermarket (gasp!). The reason was I wanted a really big cake for the palette and just couldn't be hassled baking four cakes to join together, stressing about size and uniformity etc. Spend your energy where you enjoy it is my motto - I'd rather have fun decorating the cake than baking it, hehee!

The night before I was going to decorate the cake I started worrying it would be a bit plain, boring and possibly dry under the icing. I started googling around at 11pm (as you do?!) for an easy way to moisten the cake - I was thinking like a syrup you could drizzle over it before icing it or something. Then I came across a zillion variations of Poke Cakes. So simple and fun I couldn't believe I hadn't heard of or tried it before!!! 

It's pretty simple. Poke holes in the cake, drizzle something liquid and yummy over it. Then ice. Mostly the recipes used sweetened condensed milk to sweeten and moisten the cake. I had a tin in the cupboard then has my own genius idea (ahem!) to take my art cake to the next level! So here we go.... the instructions, if you will...


An 'Art Palette' Rainbow Poke Cake!


Rather than plain condensed milk, I had the idea to dye it lots of colours for an arty/paint/rainbow effect - a fun surprise inside! Firstly, I divided the tin of condensed milk between sections in this silicone muffin tin thing, and then coloured them using food colouring (I used both gels and liquid so either can work!).


I laid out the slab cake (frozen beforehand to make it easier to cut - cheeky tip!) and had the task of trying to cut it in a palette shape. Not easy!!!! It's such a weird shape and I kind of winged it and freaked out a few times. Oh well. Sort of looks like a pacman but let's ignore that, lol! 


Then I simply used the thicker end of a chopstick to poke holes in the cake all over. You can also use the end of a wooden spoon or even a fork for lots of little holes. 


I had a syringe lying around (as you do, ha!) so decided to use it to squirt in the coloured condensed milk. Because I was using different colours I didn't want them to get mixed up. If you were just using a single colour or flavour, you could probably just drizzle or spoon it all over the cake. I  think the syringe did help it get right into the holes though! I just went line by line with different colours. This was the really fun bit!


And then the really super fun bit - icing! I made a plain vanilla butter cream icing (you know - icing sugar, butter, vanilla, milk). Then I rolled out bits of coloured fondant (some was already coloured, some I coloured with food gels) and used scissors to cut it out into painterly-blobby-sorta shapes!

Does it pass as an Art Palette??!


Done!!!

Of course, I was really excited to cut into it at the party the next day, especially as Lily had no idea about the colourful surprise inside the cake :) She loved it... #phew

Here is an after shot of the last sliver of cake after the party.

Rainbowwwwwwwwwww!!


So there you have it! An easy way to spice up a plain cake, adding moistness, flavour and even colour!

There were SOOOOO many awesome poke cake varieties out there, I am now excited to experiment and try them all! I am thinking chocolate sauce, plain condensed milk, coconut cream and even... mmmmm, salted caramel sauce??! YUM. Ok, I think cake is calling me....


Monday, 12 October 2015

A 'Dragon' Birthday Party // Eli turns 5!


My middle man Eli was turning five, and it was his turn for a much anticipated 'big birthday party'. Five years is the age in our family where you get a big birthday bash (after your 1st birthday extravaganza, of course!). The biggest problem Eli had was deciding on a theme. He suggested everything from Preztel Party (!?) to Lego Party to Tropical Island Party (my zany boy!), then finally decided on a Dragon Party... and so Dragons it was!

This little party is like a love letter to my beloved boy, a gift to celebrate him with a really special day. It was a pleasure to pour energy and creativity into this project, knowing how much he would enjoy it (and enjoy it, he sure did!). I gotta admit I had a whole lot of fun doing it too.... not least because we don't do parties all that often, so when we do I have a lot of pent-up enthusiasm to pour into them ;) Eli was my excited little sidekick the whole way, full of ideas and questions and so eager to help in every way. Eli the Happy Helper, we call him around here... always eager to pitch in, even for his own party :) Seeing his face full of awe as each element was unveiled will always be in my memory!

I love to throw parties (just not too often, lol) - and they may seem either OTT or basic, depending on your own party-preferences (and/or Pinterest addiction!)! But a little party at home, with home made cake and crazy decor works well for us! With our parties, I always like to start by providing lots of atmosphere through decorations and theming - aka crepe paper streamers everywhere, haha ;) With kids's parties, I like to keep it all pretty loose as I find young kids mostly just want to run around and giggle together! So I set out 'stations' of activities where kids can gather, play or create, without it being anything too formal or structured. Kids can dip in and out of activities as they like, or just run around. Less stress for the adults and less stress for the kids! Lots of food of course (which I like to theme as makes it easier to decide on a menu!), and keep the party short and sweet (two hours is plenty when you have a horde of kids running wild!). 

That moment when the house is full of people and laughter, scattered scraps of wrapping paper on the floor, food and drink left everywhere, our friends meeting each other, kids running amok and giggling.... it's magic. I look around and smile - that moment is worth every minute of preparation to get to that stage! :)

And so, here 'tis...

Every party starts with the invite of course! I made these up quickly on Canva.com... and even paid $1 for that dragon image! #splurge
I had the idea of making a sort of 'Dragon's Lair' cake for Eli and for the first time ever decided to delve into the rather intimidating world of fondant to make the little Dragon topper (I didn't want to do the whole cake in fondant). Guys, fondant is NO JOKE, lol, look at all the set up and tools I had to assemble!! However, I gotta say, (if like me, you have always been scared off fondant), it's actually not hard to work with. If you can make shapes with playdough, you can totally do fondant! :) It was pretty fun actually!
My little dragon (in his temporary home!). Ok, I kinda fell in love with the guy!!!!
Their favourite part of party prep.... sprinkling the table scatters on the morning of the party. We held the party in the afternoon for the first time and it was very nice having a whole relaxed morning to get ready and the whole family even took a nap before everyone rocked up at 2.30pm. Yes, I am the kind of person who gets so over-organised there is nothing to do in the last couple hours before a party. Sad, huh?? ;)
Crepe paper streamers are my go-to party decor. I mean, they just make everything festive, right?! I had some ruffling in the breeze over our front entrance. They kinda declare 'It's party time!'
I don't mind serving (and eating!) sweet treats at a party but prefer to send kids home
with something other than more sugar! As all our little party guests are so into
writing and drawing, I made up these cute little notebooks with fun stacked highlighter
markers. Hopefully they last longer than a party bag too :)


Dragon Egg Toss through the Ring of Fire:
I made this 'ring' of fire by wrapping crepe paper (again with the crepe paper!?) around a hula hoop and stringing it up to our pergola. I put a washing basket behind it on the table and a basket of plastic easter eggs (with little magnets inside to weight them a bit). Kids could take turn tossing 'Dragon's Eggs' through the Ring of Fire!
My fire breathing little dragon!! :)
I made this 'photo prop' by just cutting out and sticking layers of coloured cardboard together. It turned out so colourful and bold, kinda like a cartoon? A hot tip if you want to try this kind of photo prop for party photos... I put a piece of washi tape on the floor to show kids where to stand, and a piece of washi tape on the wall in front of their line of sight, to show them where to look, so it all lined up nicely to look like they really were breathing fire. I took photos of each party guest and they all got such a kick out of it! After the party I emailed the photo to the parents of each kid...
Oh wait, that last step is still on my to-do list!!! ;) Ahem.
My little Dragon proudly displaying his dragon wings! I had this tshirt custom made for the party as a special birthday gift for Eli. The wings come off (they attach with velcro). It was sooo cute, and he was thrilled!!
Five!
The fierce big sister dragon knows how to roarrrrr.


Fierce dragon gives his best 'Blue Steel'.
Super Fierce!

Cashew, sundried tomato and capsicum dip... with colourful capsicum sticks. Too much capsicum!?
The party table coming together... the hot food not on it yet, but you get the drift!
I made these chilled chocolate custard cups (kind of like Yogo!) topped with strawberries.
Because we are dorks, we like to set ourselves the challenge of naming every single party food within the party theme. I was struggling with these white chocolate and sprinkle dipped pretzels, till Mark cleverly came up with 'Dragon's Nostrils'! I don't think I will ever look at a pretzel the same way again!?


Our friendly little Dragon cake!
I made this cake by baking a chocolate cake in a regular round cake tin and a second cake in a glass Pyrex bowl. I then stuck the two together using whipped cream and jam! Covered the cakes in chocolate buttercream icing and sprinkled with little ball decorations (what are they called? who knows!). The fence is made out of Corinthian sticks snapped in half and then edged in Maltesers... I used icing as the glue to stick them on. The boulders are Caramel Bites from Woolworths. A pretty easy cake with high impact in the sights of my five year old :)
Dragon just chillin'. 
Fire Sticks: Always a hit!! Breadsticks dipped in white chocolate and sprinkles :)

My littlest dragon, always on the run!


Trying to fill those butterfly-filled moments before the first guests arrived, I spotted Lily regally carrying Eli's dragon tail as he walked around the house! Haha... dragon royalty, perhaps!? Guess it was a fitting way to treat our honoured birthday boy :)
My lovely mother-in-law made these dramatic fruit kebabs!! 
Layered 'fire jelly' cups made by my dear friend Amber. Kids always take the jelly first!!
It was Lily's idea to call the drinks these cool names :) They are mineral water mixed with a bit of natural cordial.
Little Harper knows how to breathe fire with the best of them!
Miles surveying the party bounty and trying everrrrr so hard not to touch!

Fireball Making Station. Styrofoam balls, stickytape, crepe paper streamers (again!), red, yellow and orange markers, and cellophane. I simply set these materials out so the kids could  create 'fireballs' however they saw fit - for a surprise purpose!
The boys hard at work decorating their dragon masks! I downloaded the template from here.

Busy whipping up some fireballs!
Harper - always ready with a smile, somehow she made it into most of the party shots. Love this kid! :)
Go Finn!! Tossing his fireball through the hoop - like a pro!
The only formal 'game' we had was Pass the Parcel - at Eli's request and of course the staple of any Aussie party!! Miles was rather keen to hang on to the parcel, haha ;)

My lovely Amber took this stunning photo of Eli... she did well as he was so busy darting around all morning I hardly could capture him. He was having the time of his life at his very own big party :) Love him to bits xx
Harper and Lily, enjoying their fire drinks!
Miles (always in a hat) took advantage of the party mayhem and parental-distraction to nab as much party food as he possibly could. Don't even ask me how much jelly he ate!!!!

The absolute highlight of the party was the surprise appearance from our very own knight in shining armour!! To fight all those fierce little dragons of course ;) The knight is also known as Sir Mark (my hubby)! The impressive (and verrry heavy) armour is borrowed from a kind friend of ours. Mark knocked on the door half way through the party and strode in (very knight-like) to a very stunned, awed and slightly scared bunch of little dragons! It was complete silence till Eli gleefully piped up 'Daddy!!!!' and I think there was a sigh of relief from the kids who did not quite know what to think!!!! Then the shrieks of glee began.... ;) 

It was so cute. The kids popped on their dragon face masks, armed themselves with the 'fireballs' they had made earlier from styrofoam and (with much joyful squealing) chased the knight around and out of the house. It was hilarious and adorable - Mark was a wonderful (friendly) knight. A friend told me her son asked on the way home 'So, is Eli's Daddy a real knight?!!'. I think Eli scored some major cool points, having a knight for a Dad, heehee. It was a surprise we had been working on for ages and it was so fun to see it get pulled off and bring such delight and fun to the party :)


Attack!!!
Runnnnnn!
Time to light the cake :) You can't see from this angle but I had one candle poking out the Dragon's mouth for 'fire'! As you can see from Eli's face he was preeeeetty excited!

Kinda love this photo (thanks Amber!). Me and my beautiful birthday boy xx
One simply must cap off the day with a post-party breakdown discussion with the grandparents....


It was a wonderful day and another party milestone passed.... best of all, Eli had a blast and felt loved, celebrated and very special.

Love you fiercely, my friendly little dragon xx